In this blog, we will look at how to get the best out of an airless sprayer. We are going to look at the following:
- Why airless sprayers are a better way to apply paint for both DIY and the professional.
- The model of sprayers out there that are the best value read this before you buy.
- How to use the equipment to get the best results, a step by step guide.
The blog will be aimed at complete beginners, either the professional decorator thinking of getting more productive or the serious DIY’er who wants to make their life easier. In this blog, we will explain the process of setting up the sprayer and the best paints to use to get the most significant results.
Finally, and for a bit of fun, we will compare the traditional brush and roller method with airless spraying to show why spraying is the future.
Before we start, we want to talk about why you should listen to us when it comes to airless spraying; PaintTech Training Academy was formed by decorators to teach decorators.
Between our team, we have many year’s of experience spraying real jobs day in and day out. We have experienced the real problems that you will come across if you start spraying. We offer an intensive airless course which is both City and Guilds assured and CITB funded. We have five training centres covering the UK and Ireland.
Why airless sprayers are a better way to apply paint for both DIY and professional
The first question you may be asking yourself is, “why bother?” You may be thinking that although you have heard that many people now spray their work, you quite like using a brush and roller, and you are reluctant to change.
We speak to many decorators in this position; there are several reasons why using an airless sprayer to apply your paint is a great option.
First, it is a great finish.
We spray ceilings, walls and woodwork with an airless paint sprayer and the finish that you can achieve is impressive. Customers will comment on the level of finish that you achieved and, in many cases, they have not seen this standard of finish on a decorating job before.
Ceilings look amazing when sprayed, and interestingly, you don’t notice roller marks in a ceiling until you have seen a sprayed ceiling, and then you realise how bad the roller marks look. The finish is uniform too, so there are no brush marks around the edge and roller marks in the middle, it is all good.
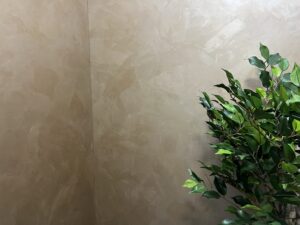
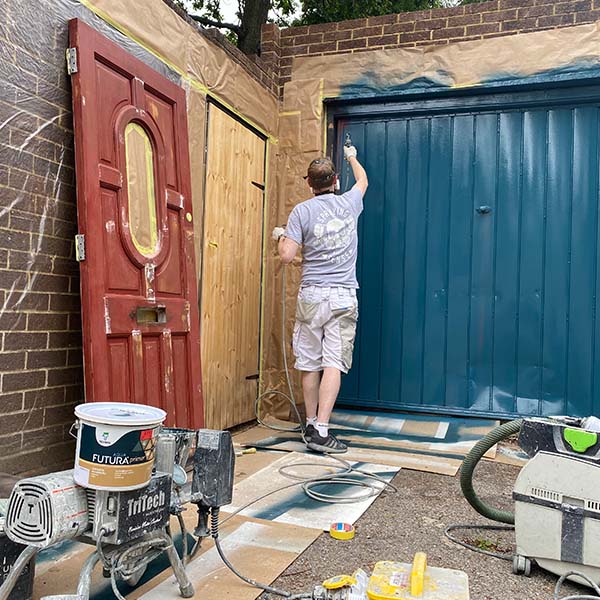
The most significant area where the finish is noticeable is the woodwork. We (in the UK) are used to seeing woodwork painted by brush, so when we see a sprayed door or window cill for the first time, it is incredible. I get many new customers who call to get a quote, and the opening line is, “are you the guy that sprays woodwork?”
Once you have seen the fantastic finish on the woodwork, there is no going back, which becomes the customer’s expectation. We were chatting with a decorator from the States, and where he lives, customers expect what he calls “an automobile finish”, and if you cannot provide that, you will not get any work.
The second big advantage of airless spraying is the speed.
Before we discuss this and keep it simple, I have done many time studies, and I have found that spraying is typically four times faster. This is an average. I have known it to be eight times faster and, in some cases, twice as fast as a brush and roller.
This is a massive advantage to both the customer and the decorator. The customer has less disruption, and you are “in and out” much quicker, leaving them to get on with their lives. The speed advantage to the decorator is that they make more money.
If we use the lower number of twice as fast and see how this would affect our earnings, you would see that if in a typical week you carry out £750 worth of work, then by being twice as fast, you would do £1500. This seems unbelievable when you first hear about it, but it is surprising how you quickly get used to it.
The speed element is often misunderstood, and we have many conversations with decorators about this. The main area of misunderstanding is masking. “Masking takes ages” they say, and they use this as an argument for “it’s quicker to roll.”
We have done many time studies on-site to measure the difference between applying paint by roller and applying paint by spray. In many cases, we have carried the work out both ways and timed each one.
We have three examples, each one with a different time difference.
The first one is painting apartments. These were mainly two-bed apartments, and the decorators who were painting them were experienced and applying paint by brush and roller. The typical time to paint an apartment was five days. Some would do it slightly quicker, and some slightly slower. This was the average.
We then decided to spray them completely, walls, ceilings and woodwork. There was quite a bit of masking to do because there was a kitchen to mask and two ensuite bathrooms. Not ideal by any means. Also, the decorators doing the work were new to spraying, so they had not had a chance to get slick.
Despite all this, the average number of apartments that a decorator completed in a week was two. Double the speed of brush and roller. Again, some decorators did more, and some did less, but this was the average. This was over 1000 apartments too, so by no means a minor job.
The second one is more interesting because it even surprised us. We had been working on many student apartments. Typically, we did around 200 a year during the summer holidays while the students were away. These were ideal for spraying because the carpets and furniture had been ripped out and was going to be replaced once the spraying was done.
We had decided early on that it would be quicker to brush and roll the ensuite bathrooms because they were not very large, and there was quite a bit of masking to do in them. For about four years we brushed and rolled the ensuites. They took an hour. We were applying white durable matt over magnolia, so they needed three coats to cover. Each coat took 20 mins. Each one was an hour in total. This was a consistent speed even when different decorators did the work.
Then one year, we were a bit behind, so we decided on one of the sites as an experiment to spray them. The chap doing the masking timed himself masking the ensuites on a whole floor. One floor had 15 apartments, and it took him an hour and a half to mask them all. That worked out at 6 minutes per apartment. I was surprised too.
It took a minute a coat to spray them, so 2 minutes in all. Including the demasking, each ensuite took 10 minutes. This was six times faster than painting them by brush and roller. Don’t forget we did hundreds of these, so it was not a fluke or a one-off.
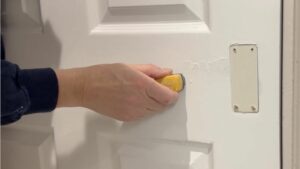
Finally, the most significant difference is with spraying woodwork. We had a door job to spray, there were 24 doors, and they were being sprayed on both sides, five coats per side. In fairness, we didn’t brush them to see how slow it would be, but we have done over the years to time the apprentices at college to see how long it took them to paint a door. An average time is 10 mins per coat per side, we think this is fair, yes you could go hell for leather and do it faster, but you could not keep it up all week. 48 sides times 10 mins = 8 hours. This is for one coat.
When we spray a door, it takes 30 seconds per side per coat. So, 48 sides would be 24 minutes, let’s say half an hour. So that is 16 times faster.
These three stories are all real, we have not made up any times, and we are constantly surprised at how fast spraying is even though we do it all the time.
The third advantage is that it’s easier.
Ceilings are something that we always spray; there are not many reasons not to. All you have to mask is the light fitting, you need to put a dust sheet down, which you would do anyway, and the finish is fantastic. The customer always notices the finish of a sprayed ceiling.
There have been times when a ceiling is small when we have decided to brush and roll the ceiling. This is how it goes. You put a sheet down and mask off the light, then you get a pair of steps out and start painting around the edge of the ceiling with a brush; this is known as “cutting in”, once this has been done, you get the roller on the end of an extension pole and start rolling the ceiling. This process is slow usually, after a couple of minutes cutting in, we are thinking, “I would have sprayed it by now, and it would be no effort.”
Then once you have done this, you find that the ceiling has not been appropriately covered and is patchy. The ceiling needs another coat. Once the ceiling is dry (a couple of hours), the whole painful process starts again. You are up and down the steps again, you’re sweating with the roller pole, the entire thing is a massive effort.
The same goes for the woodwork, especially skirting boards. If you are brushing the skirting boards, you are on your hands and knees for quite a while. It is not the most straightforward task and one that is traditionally given to the apprentice.
Once you start spraying, the process is fast, typically a couple of minutes to do the skirting in a room, you are not on your hands and knees, and the process is straightforward.
Most decorators focus on speed and forget the fact that it is also much easier. Using an example from the joinery world, no joiner would drill a hole with a hand drill; it would be slow and a lot of effort, they all use a cordless or electric drill. A sprayer is like an electric drill to the decorator.
The final advantage is that it is fun.
This one is the unexpected one that nobody talks about; I mean, work is not meant to be fun, is it? We have done a lot of on-site training with decorators and the one thing they all have once they have been spraying for a few hours is a big smile on their faces.
Why?
It’s hard to explain, but it’s just so much fun to spray the paint onto the surface and see your effortless, perfect finish, which is earning you good money. It all seems a bit too good to be true. We have spoken to decorators that were thinking of changing careers because they brush and roll everything, and once they start spraying, they have a complete change of heart and start enjoying their work again.
The model of sprayers out there that are the best value read this before you buy.
This section will look at the best value sprayers out there, depending on what kind of person you are. We will look at three types of people that would want to spray. The serious DIY decorator, the professional decorator that does small scale work and finally, the professional decorator who sprays every day.
Before we start, let’s look at the process we would go through if we chose a car to buy. We would most likely be a specific type of driver. Maybe weekend only, daily driver or long commute.
We would keep this usage in mind when we were choosing a car. We would look at three things: the vehicle’s price, the size of the engine, and finally, the power of the engine. If we were only pottering at the weekend, then there is no point buying a 3.0 litre 200 horsepower car, even though this, in theory, is “better” than a small 1.0-litre car.
If you were a sales representative and you regularly drove up and down the country on the motorway, then you want comfortable and has some power.
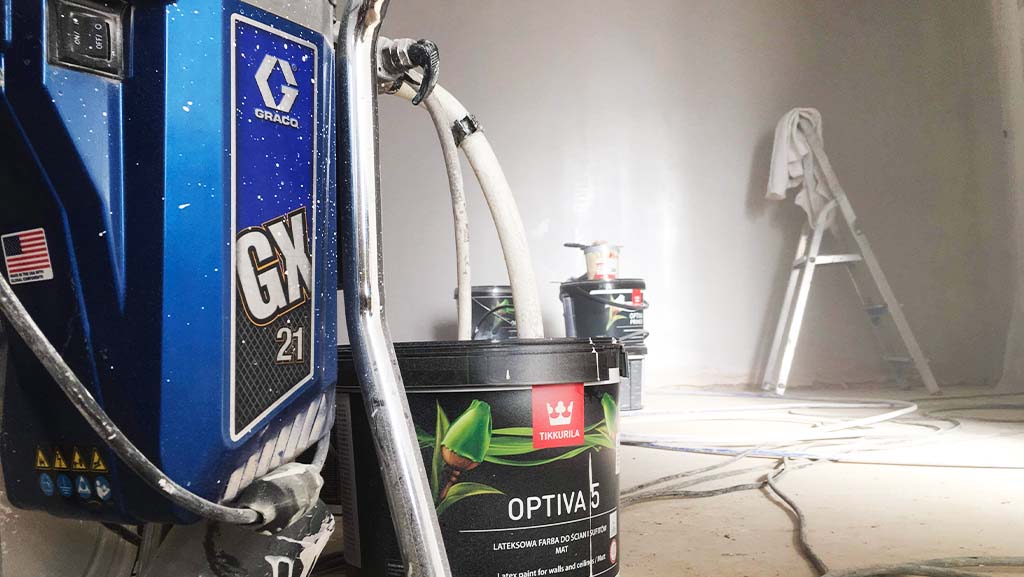
When looking at airless sprayers, we have similar measures that we look at when selecting one. Obviously, we have the price. But also, we have another couple of steps. The size of the tip that the sprayer can handle (more on tips later) and the amount of paint that the sprayer can deliver per minute. An airless sprayer is a pump that pumps paint from the paint tin to the spray gun. The size of the pump is a bit like the size of a car engine.
Tip sizes are measured in thousandths of an inch, and the bigger the hole, the more power the pump needs. If a sprayer is rated as a 19 thousandths of an inch sprayer, it will typically comfortably drive a 17, thou tip. We will give the tip rating for each sprayer that we will be looking at so that you can make a judgement as to how powerful the sprayer is. It’s a bit like the top speed of your car.
The second measure is the number of litres per minute that the sprayer will deliver. A small sprayer will deliver 1.9 litres per minute (yes, that’s a lot!), a medium-sized sprayer will deliver 3 litres per minute and a large sprayer 5 litres per minute. This is another number that spray manufacturers use to indicate the power of the sprayer. This is a bit like the size of your engine.
The main thing to decide is what type of person you are. I am going to use three labels, serious DIY, occasional use. Professional decorator spraying one day a week and finally professional decorator who sprays every day.
You will know which category you are in, don’t kid yourself; if you are DIY, then that’s fine; you will probably waste money if you buy a big professional machine. If you spray every day, don’t buy a DIY sprayer, it would only last three months, and you would have to replace it.
If you are professional and spray once a week, but you think you will eventually be spraying every day, you should still buy a machine that suits your current position. Believe me, once you get to the point that you are spraying every day, you will be able to afford another sprayer, and also, you will probably use two sprayers on jobs, so your smaller sprayer will still get used.
Brands of sprayers.
We also need to consider the brand of the sprayer. Back to the car example, this would be your Audi, Ford, Vauxhall, Volkswagen etc. Each brand will make a car in different categories. There will for instance, be a Ford SUV and an Audi SUV. Most cars these days are pretty good, and the brand, in many cases, is just marketing. This does not stop people from having their favourite brand and swearing blind that their choice of car is the best.
Sprayers are no different, and here I want to talk about brands of airless sprayers briefly. There are a handful of players, and these are as follows;
Graco: This company invented the airless sprayer, and they are also a massive company that make sprayers for every industry. They make a complete range of sprayers and offer good after-sales support. You will not go far wrong with a Graco. We like to compare them to Ford in the car world.
Wagner: This is a German company that has been around for a very long time. They make airless sprayers for both the DIY market and the professional market. They are a good quality sprayer, and they offer a full range of sizes. We like to compare them to Volkswagen.
Titan: Wagner now owns this company, so the sprayers are the same but red instead of black and yellow. Titan is now just a marking brand, A bit like Seat.
Qtech: These are a value range of professional sprayers. They come in at a cheaper price but offer good value for money. A car comparison would be the Fiat.
Tritech: Finally, we have the new kid on the block. Do not underestimate them. The company makes Apache helicopters, missiles and airless sprayers. The quality is very high, and I like to compare them to Audi.
Do a bit of research and find your favourite brand. We have every brand of sprayers, and we find that they are all good, don’t overthink it.
For each category, we will choose two brands to have a bit of choice without it getting overwhelming.
The price of the sprayer.
Once you have decided what category of person you are, don’t kid yourself – the categories are pretty straightforward, and no one is in more than one category. If you are a serious DIY decorator, your budget will be between £300 and £800. If you are a professional decorator who sprays one day a week, your budget will be between £800 and £1500. Finally, if you are a professional who sprays every day, you will need a budget of at least £1500 to £2300.
Do not try and break the budget rule. If you are a professional who sprays every day, there is no point in spending £300; it will just be a complete waster of money. If you are a serious DIY sprayer, there is no point (unless you are wealthy) spending £2300; it will just be a waste of money.
If you do not have enough money to buy the sprayer in your category, then save up until you can afford the suitable sprayer for you. Any other strategy will end in regrets and frustration.
The recommended sprayers.
Serious DIY sprayer
If you are a serious DIY decorator, you can buy a DIY sprayer or a low-end professional sprayer.
Wagner 250M
This is a DIY sprayer, and the price is around £450. Wagner does a number of DIY sprayers, and they are okay for occasional use. The flow rate is 1.25 ltr/min, and the maximum tip size is 19 thou.
Graco GXFF
This is a small professional sprayer that is an excellent little sprayer to use. They are typically £800 and have a flow rate of 1.5 ltr/min. The maximum tip size is 19 thou. This sprayer is slightly more expensive than the last one and is a better machine.
A professional decorator who sprays once a week.
You earn your living as a decorator, but you only spray part of the time, say one day a week or maybe one week a month. It would be best to have a professional sprayer; a DIY sprayer will not last two minutes on a commercial job. You could use the GXFF listed previously, and this would be the bottom end of your budget. Here are two other alternatives.
Q-tech QT190
This is a small and light professional sprayer. It is more powerful than the GXFF but is at a similar price. The flow rate is 1.9 ltr/min, and the maximum tip size is 21 thou. This would be at the bottom of your budget range but would be very capable and would make a great backup sprayer if you decided to get a bigger sprayer in the future.
Graco 395
This is a nice sprayer and is very capable. Prices vary, but you are looking at the top end of your budget at £1500. It has a flow rate of 2 ltr/min and maximum tip size of 23 thou. The great thing about the Graco sprayers is that they have a pro-exchange pump that means that you can service the sprayer yourself for just the price of a new pump; more on this later.
A professional decorator who sprays every day.
If you want to spend at the bottom of the budget range of £1500 – £2300, then you could get the Graco 395 listed in the last category, but it would be a little underpowered for daily use.
Tritech T5
This is around £1700 and has a flow rate of 2.27 ltr/min and maximum tip size of 25 thou. This is a capable sprayer and would be a happy running day in and day out all year round. It is a very robust sprayer that is designed for heavy use. This is our most recommended sprayer.
Graco 595
At the top end of your budget, you have the Graco 595, you could even push to a 695, but this would be quite a bulky machine. The flow rate of the 595 is 2.6 ltr/min, and the maximum tip size is 27 thou. Typically, prices are around £2,200, which would be the top of your budget.
In fairness, once you get to this level, you can spend over £3,000 on a sprayer, and many larger companies do.
How to use the equipment to get the best results, a step by step guide.
Okay, so you have seen the advantages of airless spraying; you have gone out and bought a sprayer that matches the type of work you do and your budget, now all you need to do is learn how to spray.
Before we go any further, we need to discuss safety. An airless sprayer works at very high pressure, typically 2,000 psi. Fluid at very high pressure is very dangerous and needs to be treated with care. This is one of the reasons that we recommend that you do a course so that you know how to handle the sprayer safely.
If your skin comes close to the fluid tip when spraying, then paint can penetrate the skin, and you will be injected with paint. Apart from the initial pain, the main problem with this is that paint is toxic, and once it is inside your body, it is difficult to get out without surgery. If you have an accident, you need to go to the hospital immediately and present the safety card that comes with the sprayer.
When you are not actually spraying, constantly engage the trigger lock. When changing the tip or adding accessories, always depressurise the machine.
At the end of this section, we will talk more about health and safety, including masks and goggles.
The airless sprayer is a paint pump with a suction tube that draws paint out of the bucket and a return tube that pumps the paint back into the bucket. The switch on the side of the sprayer needs to be set to “prime” for this to happen. When you want to spray, the switch is changed to spray, and the paint will pressurise, ready to spray when you pull the trigger.

Tips.
The gun at the end of the hose has a tip guard, which is designed to take the tip. The tip is what makes the spray gun atomise the paint. It works by forcing the paint through a tiny hole at very high pressure.
When you buy an airless sprayer, you get the default 517 tip, which applies emulsion to ceilings and walls. The number on the tip is essential. The number is broken into two parts; –
5 – This is the fan width and is double the number, so in this case, 5 X 2 = 10″ fan.
17 – this is the hole size and is in thousandths of an inch. A 17 thou hole is tiny. Tips are a topic in themselves and are beyond the scope of this blog.
Filters.
Filters are essential, the main one is in the gun’s handle, and for a 517 tip, it’s a 50 mesh filter and is typically white. (Graco are black). You must use the correct filter with the tip, or you will get a lot of blockages.
To set the sprayer up, you need to carry out the following steps.
1. Plug the sprayer in.
2. Turn it on.
3. Put the suction hose into the paint. Emulsion paint is good to start with.
4. Turn the sprayer to prime and turn the pressure up. The paint will circulate, and some water will be dumped into the paint. Let this run for about 15 seconds so that there is no air left in the pump.
5. Once the pump is primed, you need to turn the pressure down to stop the sprayer.
The next step is important, take your time and think about what you are doing. There will be water in the hose from the last time you cleaned it out or air in the hose if it is brand new. Hold the gun and pull the trigger. Make sure that there is no tip in the gun; we will put this in later. At this point, there should be no pressure.
6. Turn the switch to spray and point the gun into an empty bucket.
7. Slowly turn the pressure up until the water starts to pump out of the gun. You are now waiting for the water to turn to paint, or if it’s just air being pumped out them, you are just waiting for paint. This will take about 30 seconds.
8. Once the paint is coming out of the hose, release the trigger, turn the pressure down and turn the switch to prime.
You are now nearly ready to spray. You need to insert the tip into the tip guard and set some paper up on the wall to test your spray pattern. You will typically work at 2000 psi.
9. Turn to spray and turn the pressure up to around 1500 psi.
10. Pull the trigger and spray a band on the paper. If the band is nice and smooth, then the pressure is correct. If there are lines or “tails”, then you need more pressure. Increase the pressure until you get a nice smooth spray pattern.
You are now ready to spray. Setting up the sprayer seems complicated, but it doesn’t have a practice just using water (without a tip) for starters and get a feel for how the “spray/prime” switch works. Then move on using paint. It is good to practice outside or in an empty room that is ready for decorating.
Spray technique
There are four things to remember when you are spraying; get these right, and your first few attempts at spraying will be successful.
1. Keep the gun at the correct distance from the surface.
This should be around 12 inches. This is important because if you are too close, you will put too much paint on the surface, and it will run; if you are too far away, you will get a lot of overspray. This is the number 1 beginner error; they are typically around 20 inches from the surface, which is too far.
2. Keep the gun the same distance from the surface.
This may seem the same as the last one, but it isn’t. Many people “fan” when they spray; the gun goes closer to the wall in the middle of the stroke and further away at each end. This gives you a curved fan pattern, and there is too much paint in the middle of the stroke and too little at each end. Even experienced sprayers struggle with fanning; it’s hard to see yourself doing it. Get someone to video you spraying and watch it back.
3. Trigger on and trigger off on each stroke. Don’t just hose the paint on. Try to keep the gun moving when triggering on; otherwise, you will dump a load of paint in one spot. This is quite difficult when you first start.
4. Overlap each pass by 50% so that you get a nice even coverage of paint.
If you want more information about all the information in this blog, it is covered in the free booklet “Simple steps to spraying – book one airless.” Even better, you could come on our “Apply paint using airless spray equipment” course to get tuition and hands-on experience in a safe environment.